Manage the contract ledger
Learn how to accurately track and manage financial transactions, from recording payments to reconciling balances. We'll guide you through each step to maintain precise and up-to-date ledger entries, crucial for the financial integrity of your warranty contracts.

Permission is required: Users with the Contract Ledger permission can make edits to the ledger.
Ledger Overview
- Go to Contracts and select a Contract.
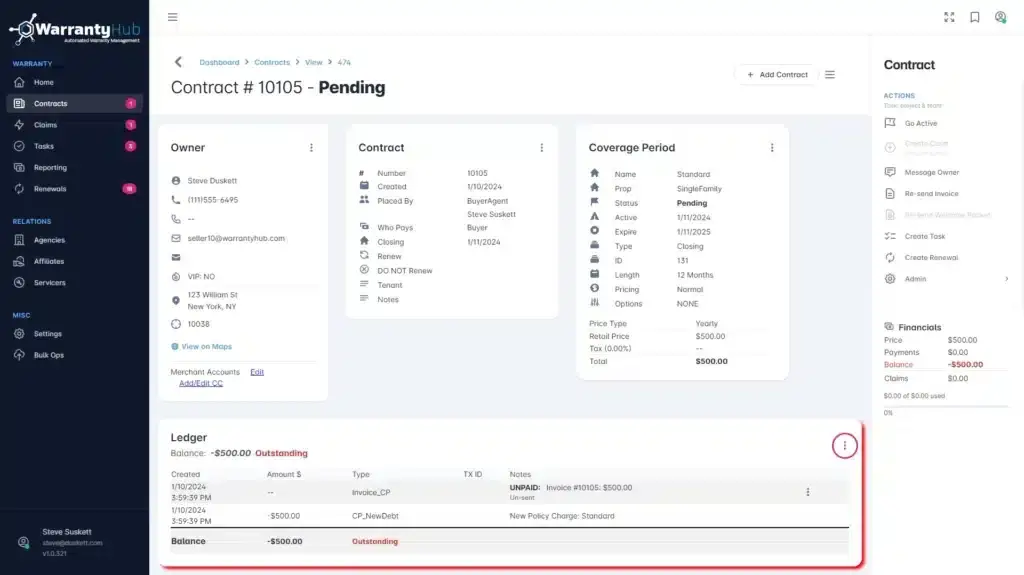
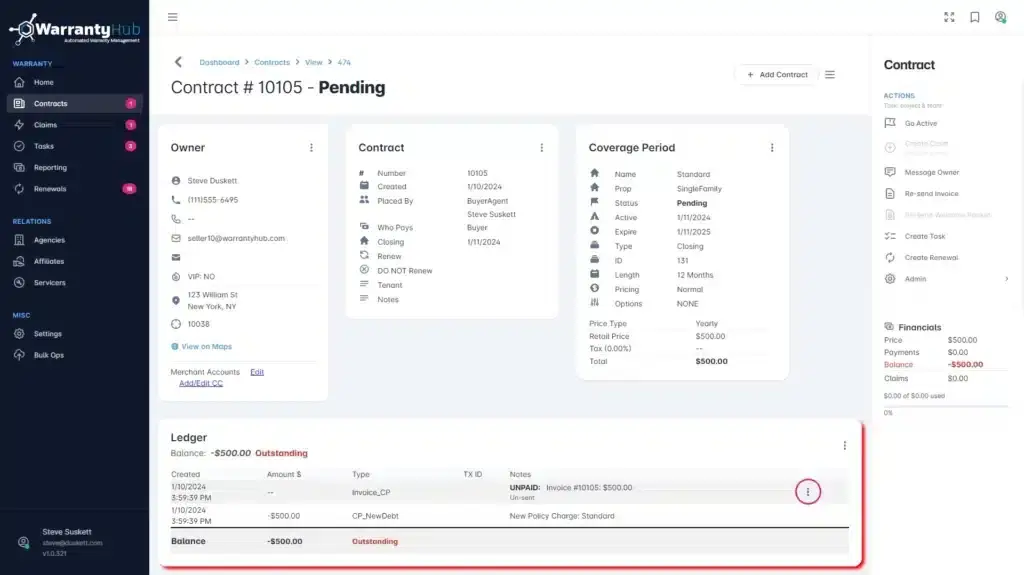
- On the contract’s overview page, scroll down to find the ledger section.
Understand ledger entries
- The ledger will display the initial transaction as an outstanding balance, indicating that a payment is due for the warranty policy.
Record or add a payment
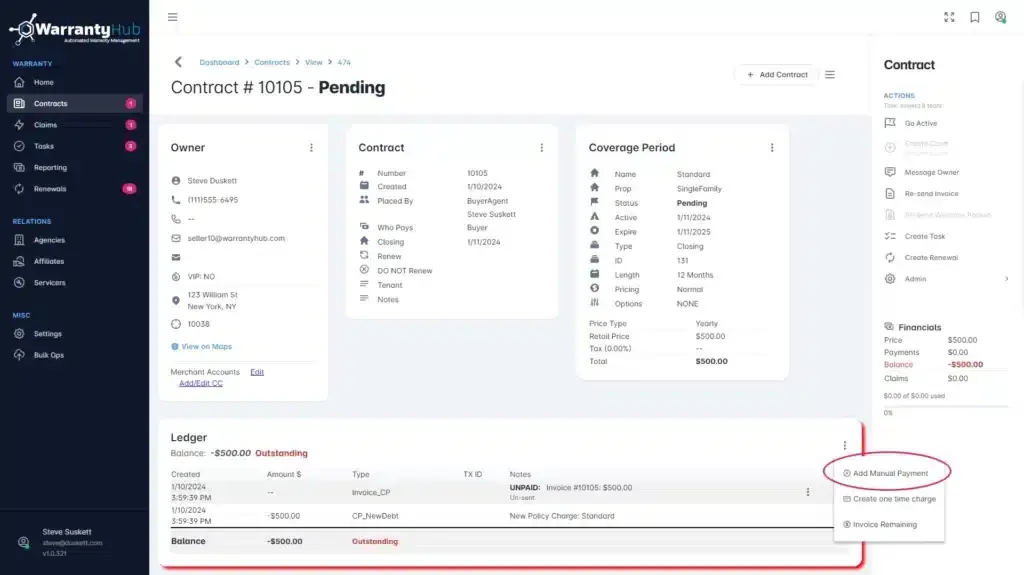
- To record a payment, click on the 3 vertical dots and then click on Add Manual Payment.
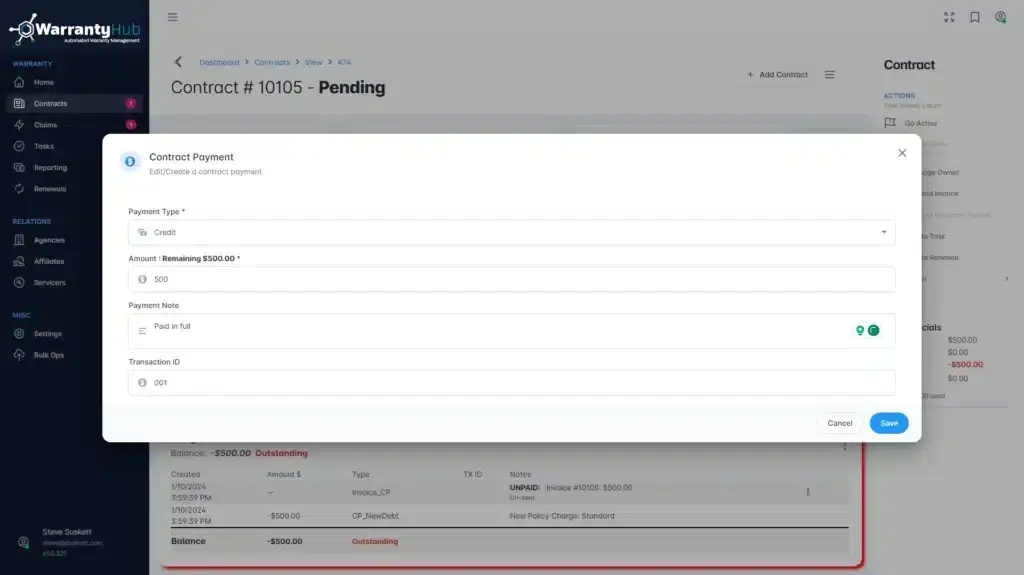
- In the payment pop-up, enter payment details, including the amount, payment method, and any relevant notes or transaction IDs.
- After ensuring all the details are correct, click ‘Save’ to record the payment.
- The ledger will update to reflect the new balance, which should now be reduced by the payment amount.
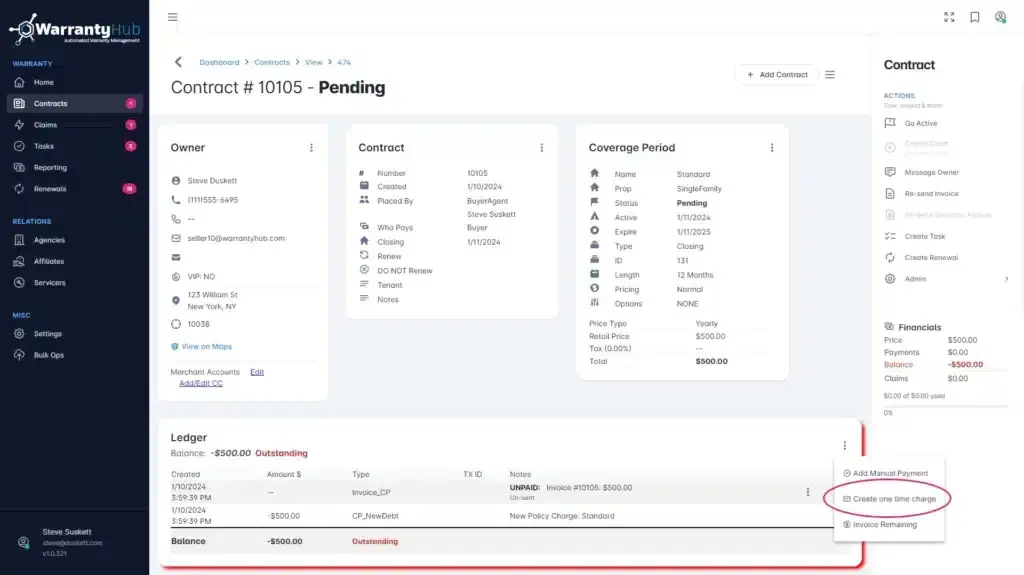
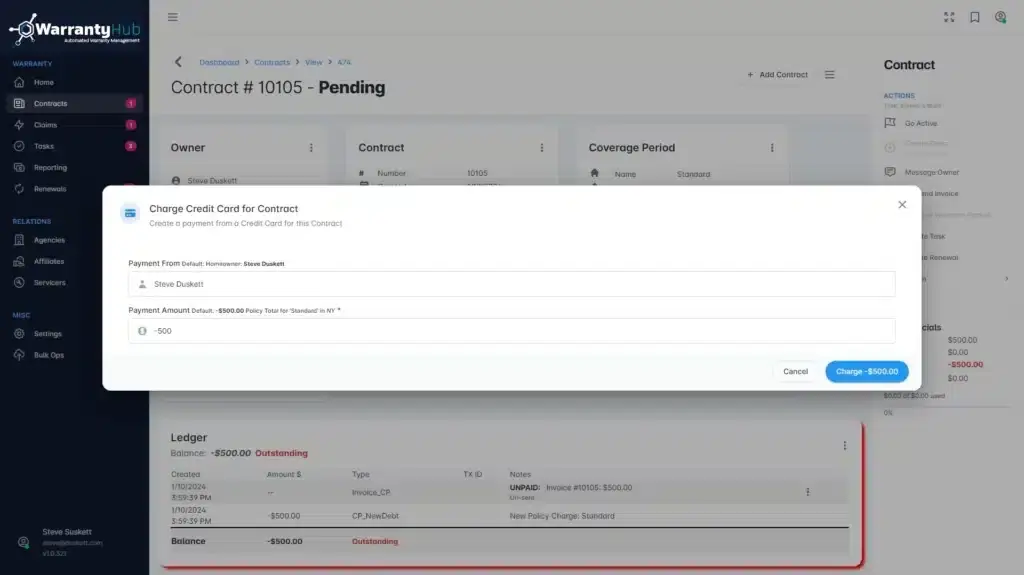
- If the contract requires an immediate one-time charge, such as for a service fee or setup cost, you can click on ‘Create one time charge’.
- Enter the amount and any relevant details, then confirm the charge. This will be reflected as a new entry in the ledger.
Invoice a remaining balance
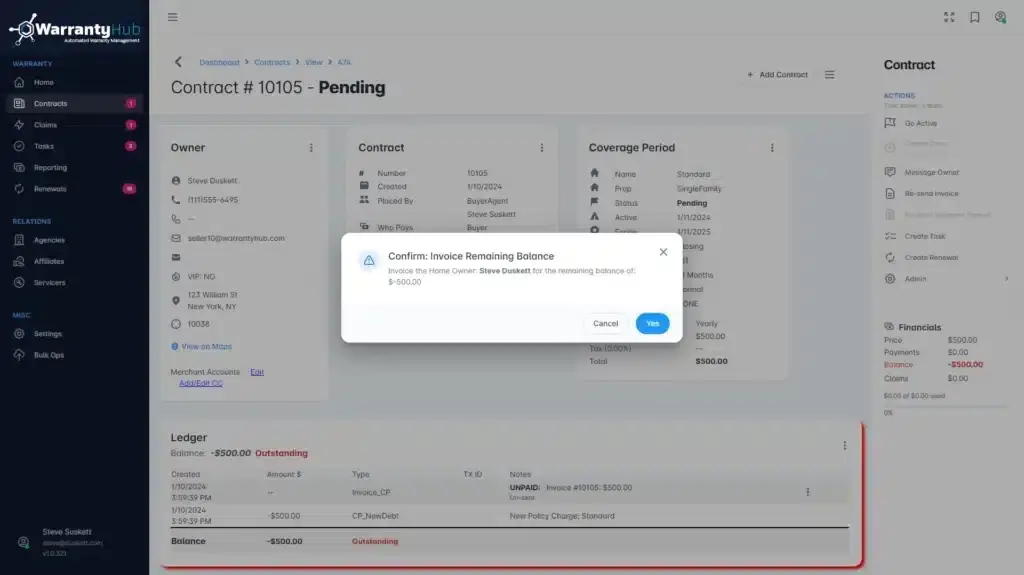
- Should there be a remaining balance on the contract, select ‘Invoice Remaining’ to generate an invoice for the homeowner.
- This will facilitate the collection process and keep your financial records up to date.
Manage ledger entries
- View Invoice: Displays a detailed breakdown of charges and any payments applied.
- Send Invoice: Electronically dispatch the invoice to the homeowner or other responsible parties for payment.
- Mark as Paid: Once payment is received, you can mark the invoice as paid, which updates the ledger balance and reflects the completed transaction.
- Void Invoice: If an invoice was created in error or is no longer valid, the ‘Void Invoice’ option can be used to cancel it out. This should be used sparingly and only when absolutely necessary, as it affects financial tracking.
Related Articles
Add and manage affiliates
Discover how to effectively manage affiliates by learning how to add, edit, and invite them to the WarrantyHub platform. Add an affiliate Before proceeding: Affiliate profiles must be associated with an agency, so make sure you have created an active ...Configure and manage tax settings
Discover how to configure sales tax for your policies. WarrantyHub can automate the calculation of sales tax on your contract invoices. Permission Required: Users with the Settings permission can access this feature. Configure tax settings Step 1: ...Set up and manage event notifications
WarrantyHub provides product event notifications to keep customers, agents, affiliates, servicers, sales reps, and groups informed. You have the flexibility to enable or disable these notifications as needed, with notifications sent through email or ...Create a contract or warranty
Create a contract in the dashboard Go to Contracts in the dashboard. Select + Add Contract in the top right corner. Property Enter the address associated with the contract. Note: Be sure to select the address from the Google Places dropdown (see the ...Add and manage policy coverage items and optional coverage add-ons
Learn how to add, edit, and manage a policy’s coverage items. Whether it’s changing limits, setting costs, or updating coverage types, you’ll find the flexibility you need to offer bespoke warranty solutions. Permission required: Users with the ...
